Your Cart is Empty
START 2026 OFF RIGHT - JOIN THE FREE-MOTION MASTERY FATHER'S DAY QUILT-ALONG! CLICK HERE
Recently Zoom launched a new subtitle function that automatically generates captions for online meetings. I'm REALLY excited about this! Adding captions to a meeting makes it that much more accessible, especially to those who might have hearing issues. So, in this post I'll show you how to add captions to your Zoom meetings.
There are three ways you can add closed captions to a meeting:
1) Have someone in the meeting type them
2) Have an outside source connect to the meeting and create them
3) Activate Zoom's in-meeting function to automatically create them.
I'm going to talk about method #3, using Zoom's automatic in-meeting function.
Let me start off by saying that automatically-generated captions are not perfect: sometimes words or phrases that the program doesn't understand get translated oddly, or homonyms (words that sound alike but are spelled differently and have different meanings) may be confused. Usually any mistakes can be read through and understood within the context of the discussion and viewers can get the gist of what's being said. The bottom line is: imperfect is still an improvement over nothing at all.
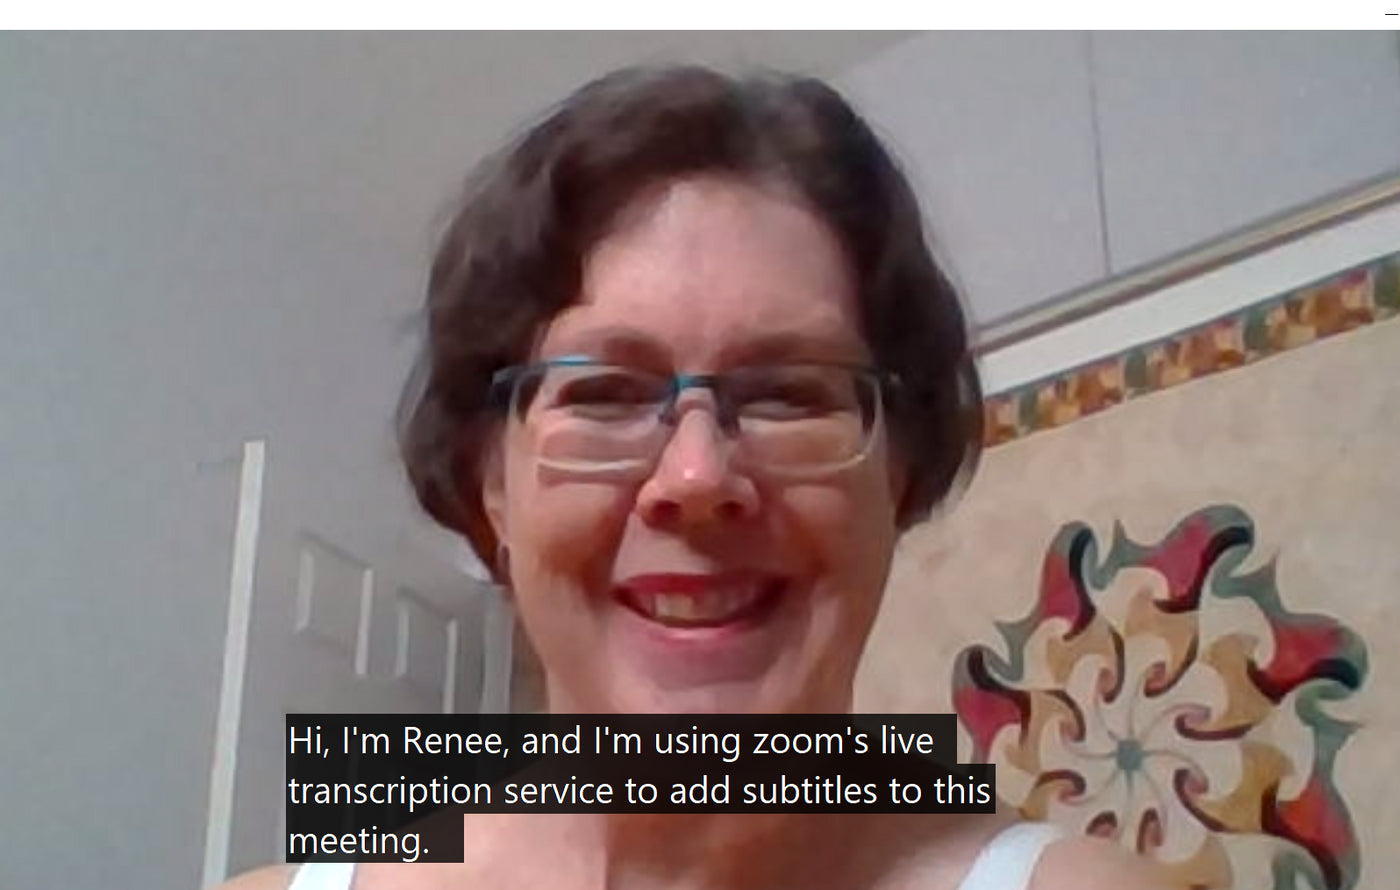
When Zoom talks about captions, they make a distinction between "closed captioning" -- which refers to someone typing in captions, or a 3rd-party service creating captions -- and "live transcription" which refers to Zoom's in-app automatic captioning function. In this post I'm talking about the live transcription function.
Live transcription works on both free and paid accounts. A complete rollout of live transcription on all accounts will happen by Fall 2021. If your account doesn't have it yet, you can request it here.
So how do you set up live transcription in Zoom? It requires just a few clicks and you're good to go. Here are instructions for setting up on a computer. The link at the bottom of this article will give you more information about doing it on other devices and in a variety of operating systems.
1) Log in to your account, then click on "Settings" in the LH column.

2) On the Settings page, scroll down to "Closed Captioning." Toggle on the Closed Captioning switch. Check the box next to "Enable live transcription service to show transcript on the side panel in-meeting." This turns on the live transcription function in Zoom. (It says it will show in the side panel -- it actually shows up as subtitles on the picture, but you can click a setting in the meeting to open it in a side panel -- read on.) Also click on "Save Captions."

3) Now, in a Zoom meeting, participants will find a "Live Transcript" icon in the Tool Bar: (If you are using a lot of tools, it may be under the "More" button). Meeting participants should see subtitles appearing at the bottom of their picture as you (or anyone else) speak.

4) If any viewer clicks on the small arrowhead next to the CC icon, a menu will pop up that gives them options to hide subtitles, watch subtitles in a side bar, or change subtitle settings.

Click on "Subtitle Settings" to change the font size. The slider bar at the top of the pop-up menu lets each viewer adjust the font size to whatever is comfortable for them. As Host, any change in font size will appear only for you, not for other viewers, but will also affect the font size that appears in the recording of the meeting.

That's all there is to it! Captions will appear in the meeting and will be saved in the recording.
To learn more, visit Zoom's article on closed captioning and live transcription. If you scroll all the way to the bottom of that page you will find a section entitled "Viewing closed captioning or live transcription" which gives detailed, step-by-step instructions for each type of device and a variety of operating systems.
I hope you found this helpful, and that your meeting participants enjoy the added benefit of having captions in your online meetings.
Happy quilting!
RaNae Merrill
www.FreeMotionMasteryinaMonth.com
----------------------------------
Hi RaNae,
Comments will be approved before showing up.